Contents
What is it?
NESA, or NES Audio, is a mod based off the CMoy Pocket Amplifier with some very helpful advice from the NESdev forums, and the folks from XCSSA. It is designed to circumvent the standard audio path on the NES, which is known for adding noticeable audio noise.
This article covers NESA 2.3, the successor to the original NESA board, the details of which can be found on Tim’s personal website
Audio Comparison
Here are some comparisons between emulation, NES, and the NESA mod. Unless otherwise noted, no changes were made to the original audio. Everything was done using a PowerPak. When using the NESA, the cartridge audio was muted since I do not output cartridge audio from the standard NES audio out. The recordings were done in Live and were routed through a standard audio mixer (which likely adds a bit of noise, though likely only a tiny amount).
Music
Here are 3 versions of song #6 taken from TSSF’s NES cover of MegaMan 10 (you can find the NSF at Zophar’s Domain). Since you cannot really hear the difference in unwanted noise, I added some panning to illustrate that one can now muck around with the audio channels independently. No effects were used for any of the recordings, other than the panning. Pay close attention to non-lead square as it sounds noticeably different in FamiTracker than on the NES. Also note the drums as they tend to sound subtly different, though it is more noticeable with DPCM samples (these are not in the comparisons below).
FamiTracker: [audio:http://victimcache.com/wp-content/uploads/2012/02//FamiTracker.mp3]
Original: [audio:http://victimcache.com/wp-content/uploads/2012/02/Original.mp3]
NESA: [audio:http://victimcache.com/wp-content/uploads/2012/02/AudioMod.mp3]
Note that the NESA sample is from the original NESA 1.0 board. 2.3 sounds essentially the same.
Noise
Below are noise comparisons. I was able to take these by playing a song that had an end-point using the PowerPak. After that, I set my inputs to max basically and recording the result. Since the results were very soft using NESA, I then increased the output post recording to +18dB from original. It’s not an exact science but definitely illustrates the significant drop in noise by using NESA. I don’t have an oscope or anything to provide anything more specific. I thought about taking a pic of the waveforms taken from Live but, meh, I think this illustrates the point well enough.
NESA: [audio:http://victimcache.com/wp-content/uploads/2012/02/Mod-Noise-18dB.mp3]
NES OUT: [audio:http://victimcache.com/wp-content/uploads/2012/02/NES-Noise-18dB.mp3]
Note that the NESA sample is from the original NESA 1.0 board. 2.3 sounds quiet as well but direct comparisons have yet to be made.
NES Audio
NESA supports 3 channels, which is different from some of the other mods out there. The NES itself only outputs 2 channels off the 2A03 CPU (one pin outputs the two square-waves; and the other the triangle, noise, and DPCM). The 3rd channel is for cartridge audio. In my case it is mostly for thePowerPak. The PowerPak is able to emulate many of the extra sound-chips found on some of the Famicom titles. Though these chips can be emulated in software, I liked the idea of using the PowerPak to keep things consistent. The PowerPak does sound a bit more grungy over just exporting the audio from FamiTracker, which results in a more realistic sound. To be fair, the differences between the original VRC6 chip and the PowerPak can be heard.
The 2A03 itself also sounds more expressive, such as with the noise channel. FamiTracker sounds too pure and it’s emulation of some of the NES quirks is not totally perfect. Don’t get me wrong, FamiTracker sounds great but using a real NES just gives the result more depth. Plus it’s cool to say that the music I record was done using a real NES 🙂
In terms of audio quality, it sounds wonderful! How much of that is the op-amp and how much is just tapping off the 2A03 directly is hard to say. In fact, NESA may have been more than necessary for just recording audio off the NES. The NESDev forum post above includes some simpler alternatives. Nonetheless, the sound is noticeably improved – before using NESA, there was a noticeable buzz that was hard to ignore. Worse, when needing to do any multitrack recording, the noise was multiplied. When using NESA, while some NES noise can still be heard, it is much diminished. The noise from the PowerPak can still be heard and while it is lessened, it is not completely mitigated. The noise is likely internal to the PowerPak and, as a result, must be cleaned up via other means.
Building It
The PCB
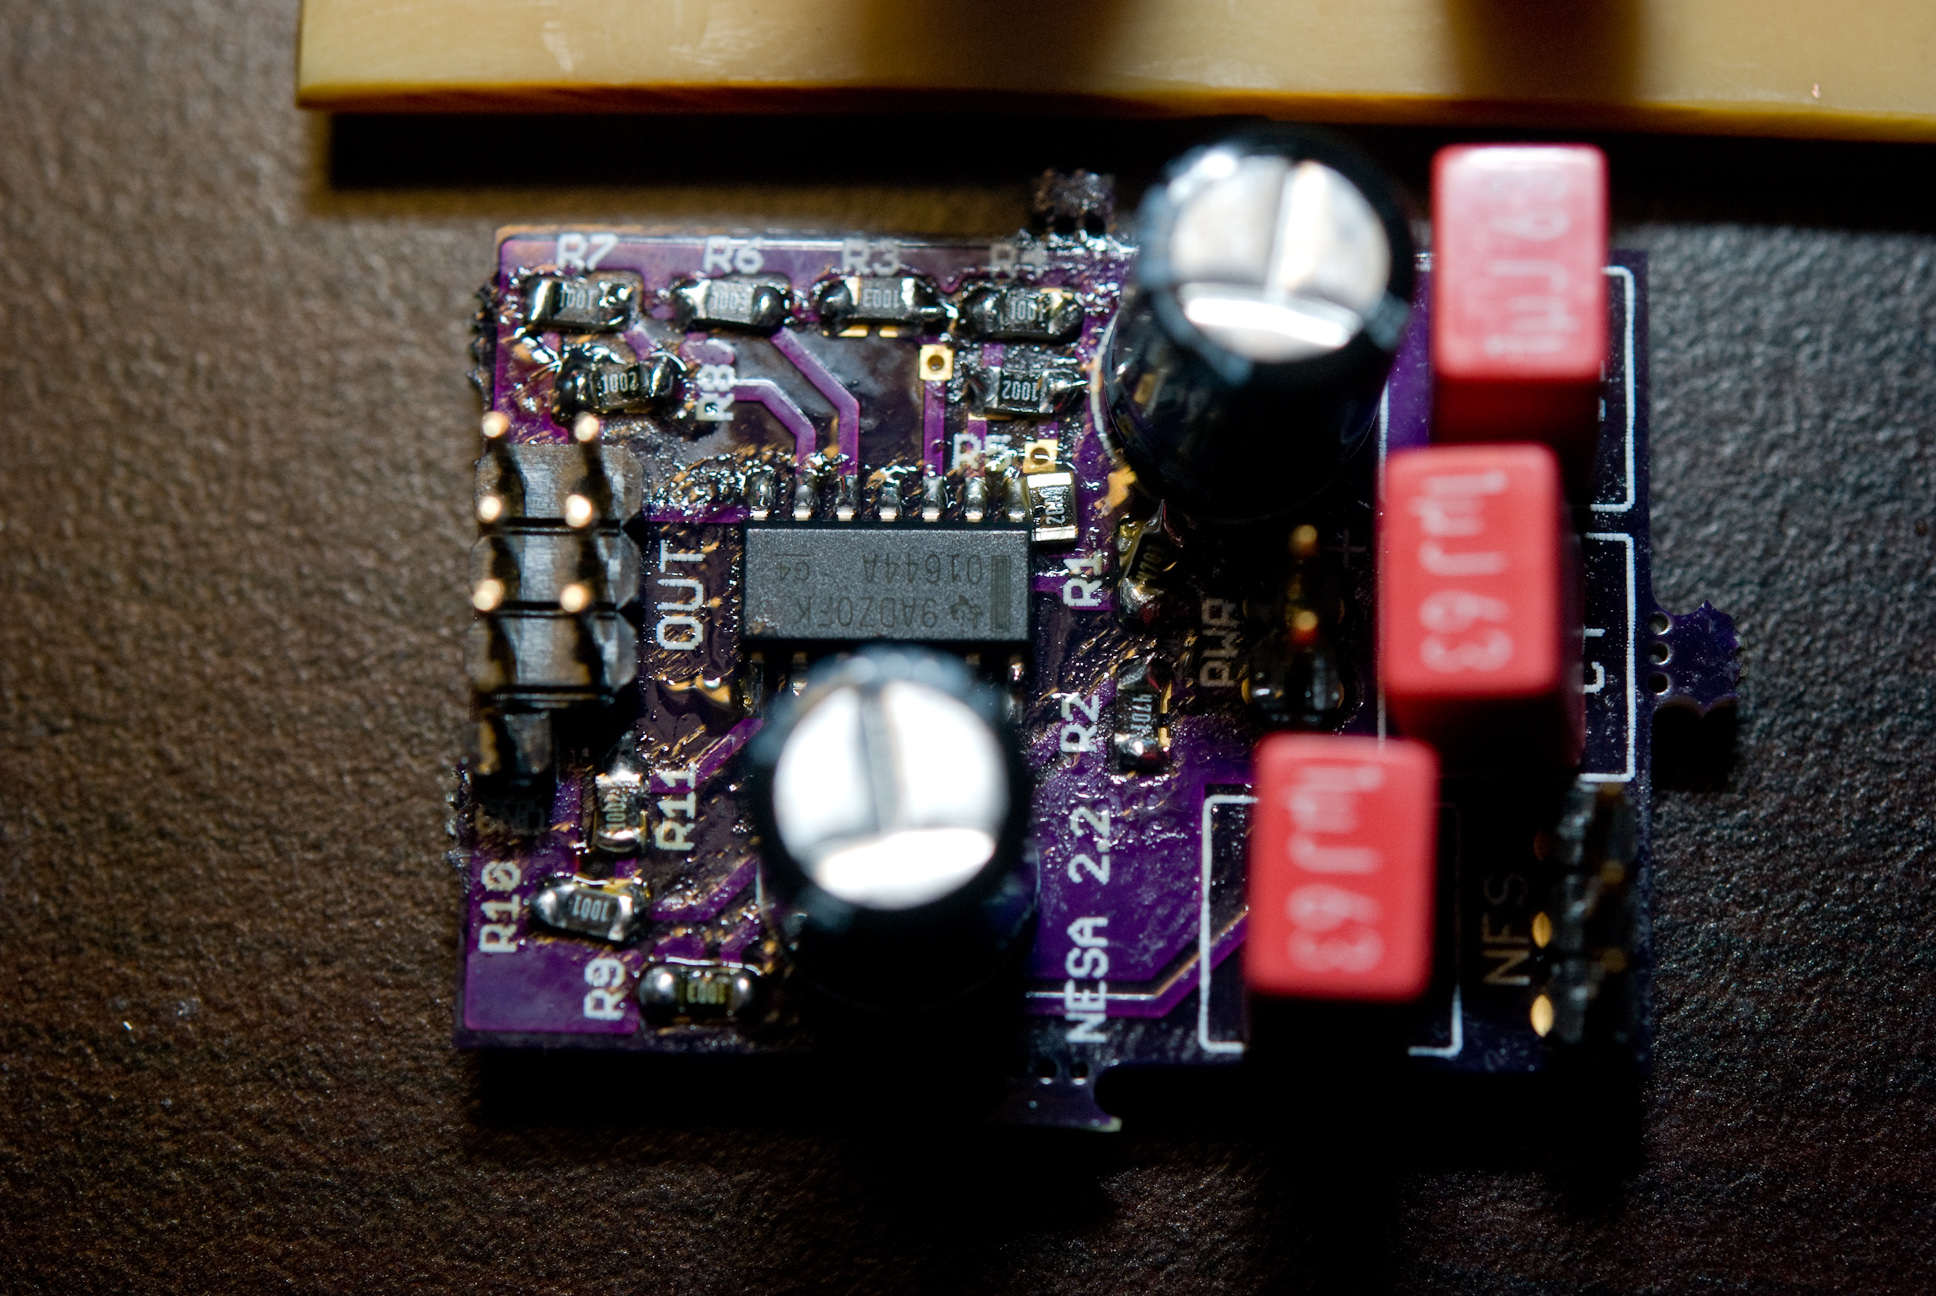
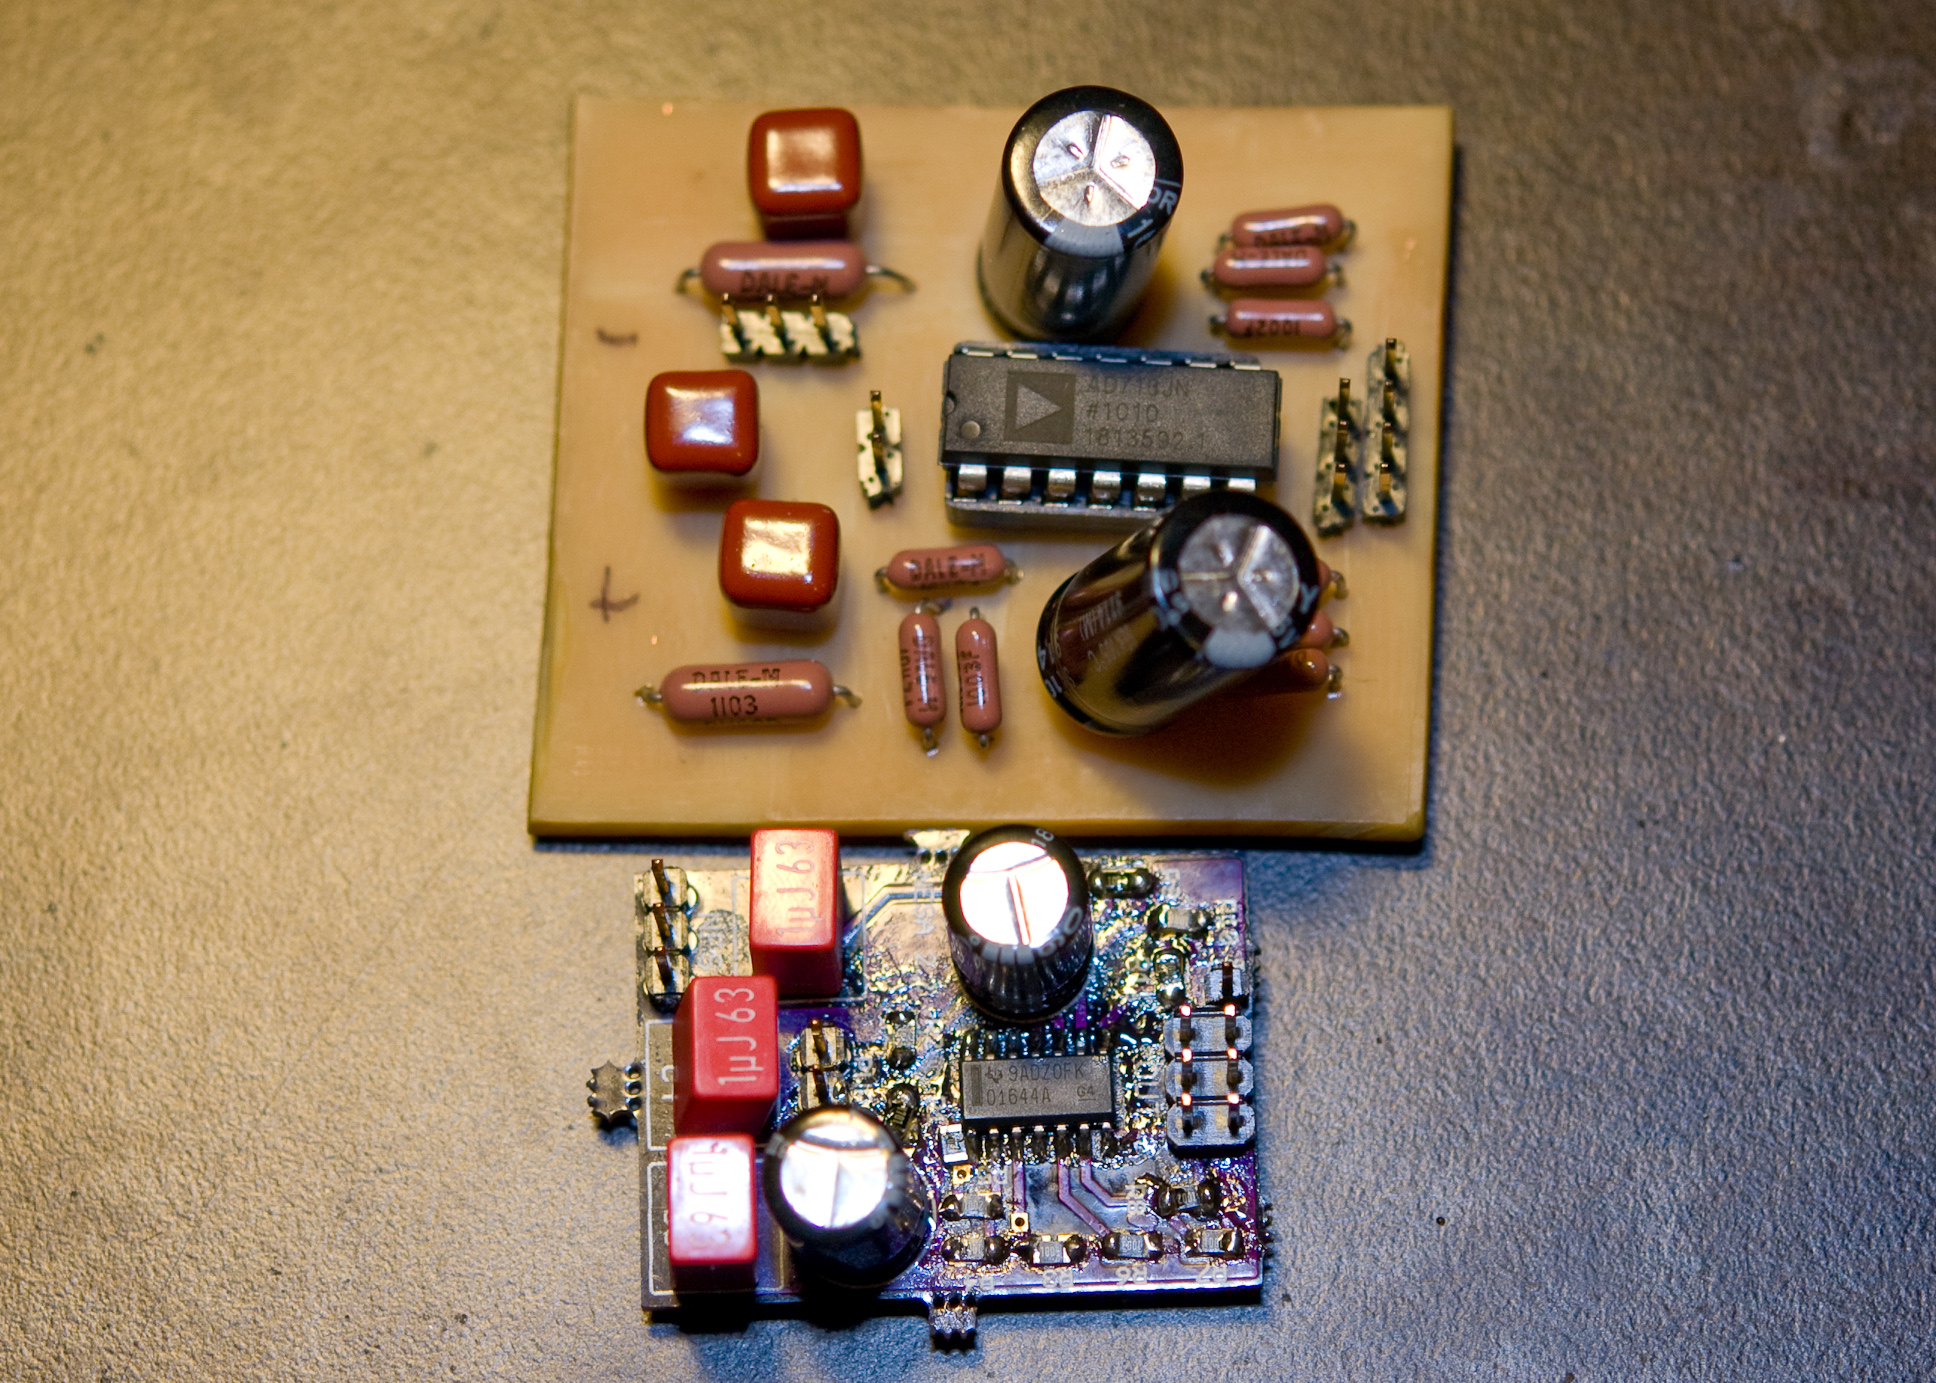
The second revision of the NESA board uses mostly SMD components and is a two-layer board. As a result, the board can be tricky to etch “at home”. The one currently in use was fabbed via the Dorkbot Batch PCB Order. Compared to the first revision, it is about half the size, allowing for more options for placement and power.
Powering the amp
The original NESA required a 10VDC supply as the op-amp required 5V and a voltage divider was being used. In practice, either 18V (when using 9V batteries) or 12V was provided to power the amp. Power draw has been reduced to 2.25V in NESA 2.3 by using a low power op-amp. As a result, it can be powered from a 9VDC power adapter, which is also sufficient to power the NES itself. This means that it is possible to power both the NES and NESA from a single supply. All this is required is to find a linear-regulated 9VDC power adapter and connect power to the NESA from the DC input jack on the NES.
Parts
Parts can be found in various places, but for NESA 2.3, all parts were obtained from Mouser except for hookup wire and phono jacks as these were purchased locally from Radio Shack.
| Item | Mouser Part # | Qty |
|---|---|---|
| Texas Instruments OPA1644AID Op-Amp | 595-OPA1644AID | 1 |
| WIMA Polyester 1uF Film Capacitor | 505-MKS21/63/5T | 3 |
| Panasonic Aluminum Electrolytic 16VDC 470uF Capacitor | 667-EEU-FR1C471 | 2 |
| Vishay 1/3W 4.7k 1% Thick Film Resistor | 71-CRCW08054K70FKEAH | 2 |
| Vishay 1/3W 1k 1% Thick Film Resistor | 71-CRCW08051K00FKEAH | 3 |
| Vishay 1/3W 10k 1% Thick Film Resistor | 71-CRCW080510K0FKEAH | 3 |
| Vishay 1/3W 100k 1% Thick Film Resistor | 71-CRCW0805100KFKEAH | 3 |
| (Optional) 3-row DIL Header | 1 | |
| (Optional) 6-row SIL Header | 1 |
Wiring the Mod
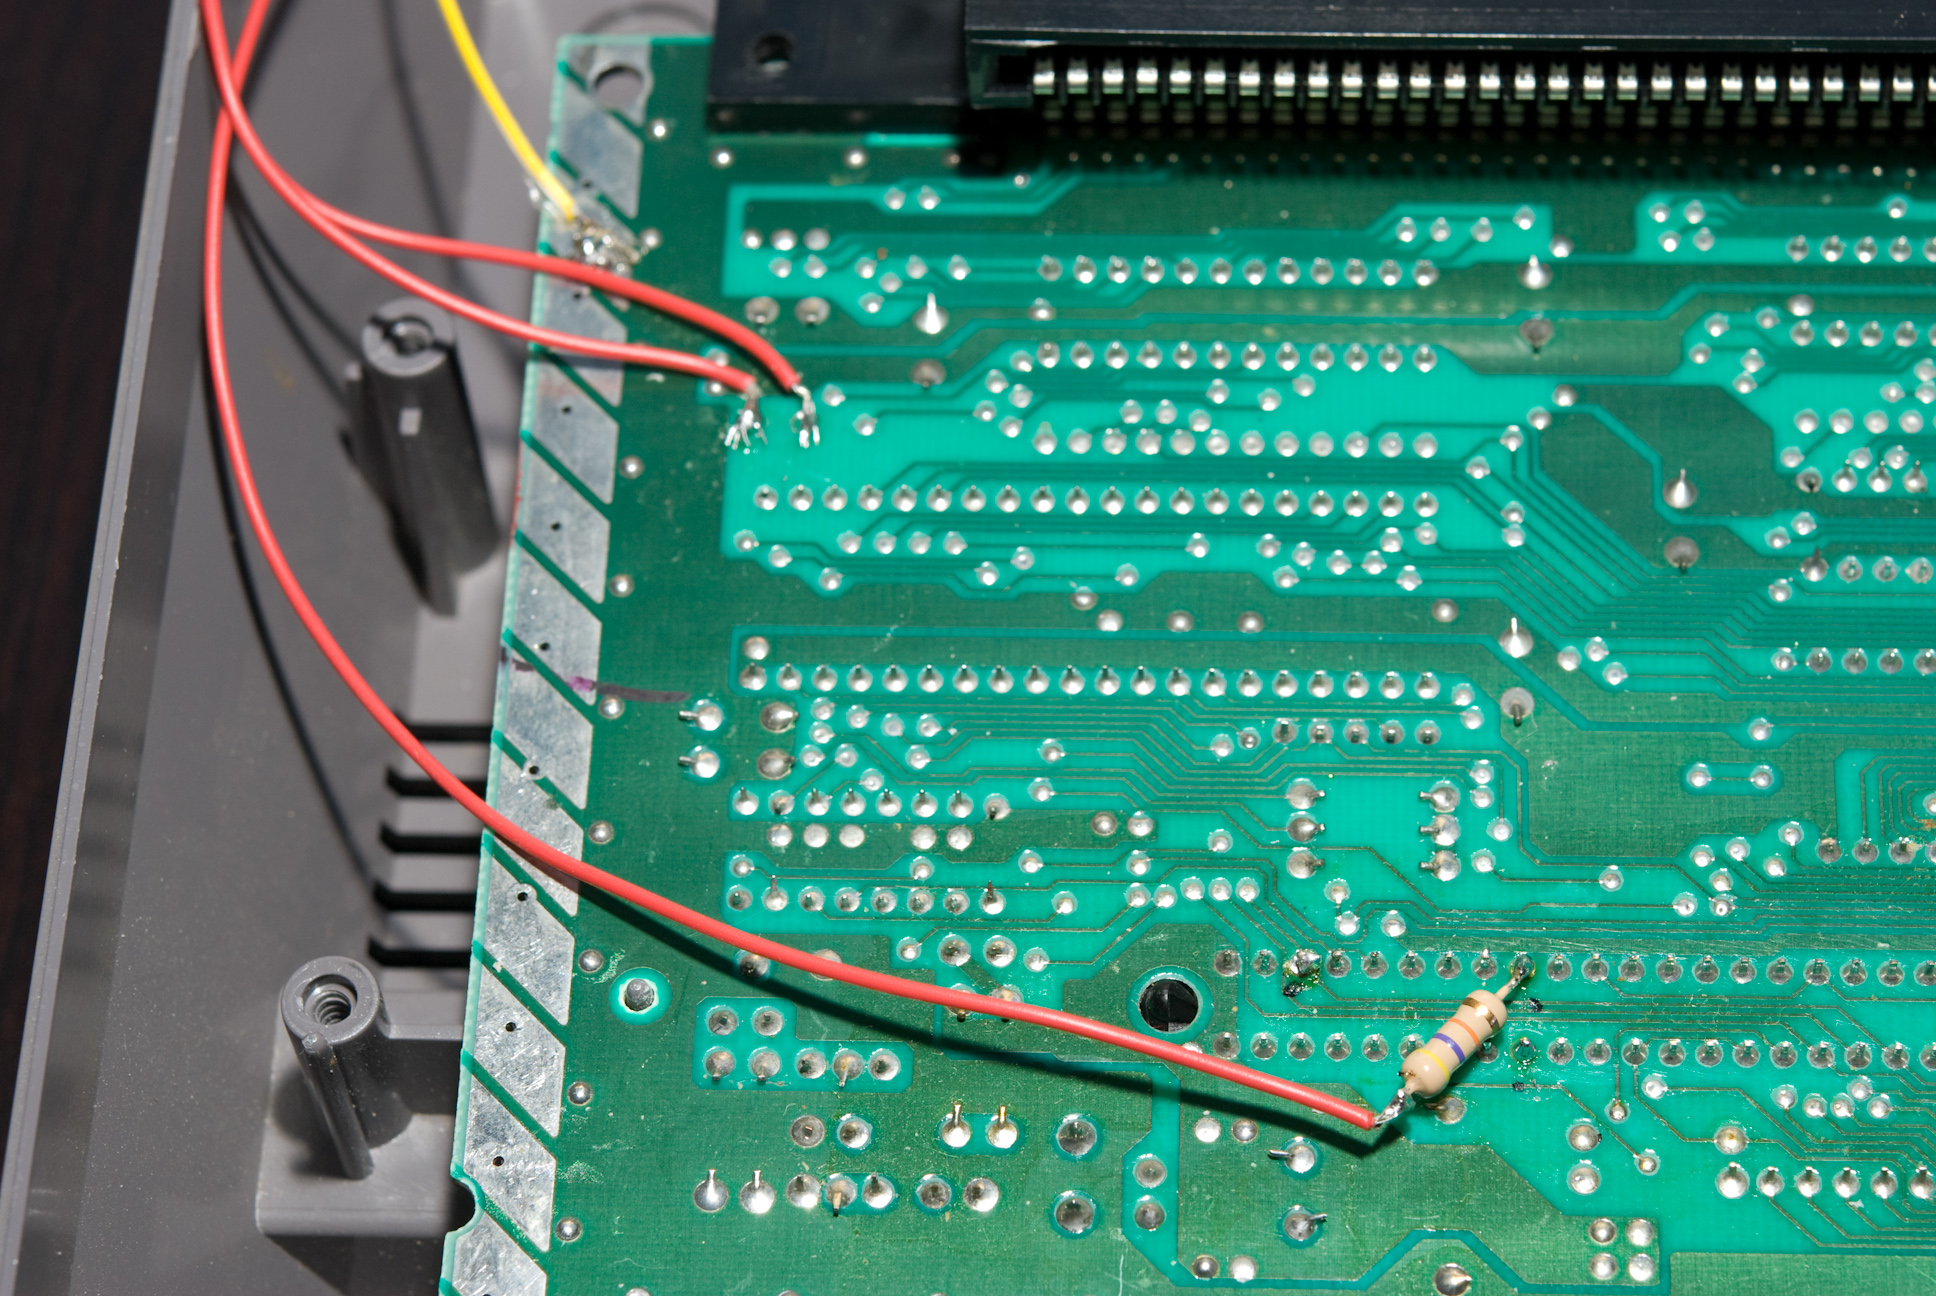
Getting audio from the 2A03 is done by tapping pins 1 and 2. These are the ones whose output feeds into resistors. it is recommended to tap off the input of the resistors instead of the CPU pins directly. For the PowerPak, use pin 9 from the expansion port along with a 47k resistor. The resistor value is typical when mixing the PowerPak audio in with the standard NES out, but it does resulting in noticeably loud audio from the PowerPak. Thus a mixer is likely required to properly attenuate the audio from the PowerPak. Experimenting with different resistor values should help resolve this issue. The input from the 2A03 and PowerPak can be connected to the NES header on the NESA board in any order desired, depending upon needs.
The op-amp needs a ground reference, the easiest of which is to use the metal strip on the left-hand side of the NES mainboard. Just solder a wire flat onto part of the strip.
If using a 9VDC power adapter (instead of the 9VAC that comes with the NES) to power the NES itself, solder wires to the input DC jack and wire this up to the PWR header header. Note polarity!
The output comes from the OUT header on the NESA board and offers individual GND headers to make it easy to wire up RCA jacks, or discrete jacks which require their own GND source. RCA jacks are often a good choice since these can be used to connect the NES to a stereo, mixer, etc.
NES Case Mods
The original NESA design was too big to fit into the NES without cutting one of the posts used for the top metal shield. NESA 2.3 may no longer require this (though it has not been tested). The board fits under the back of the 72-pin connector.
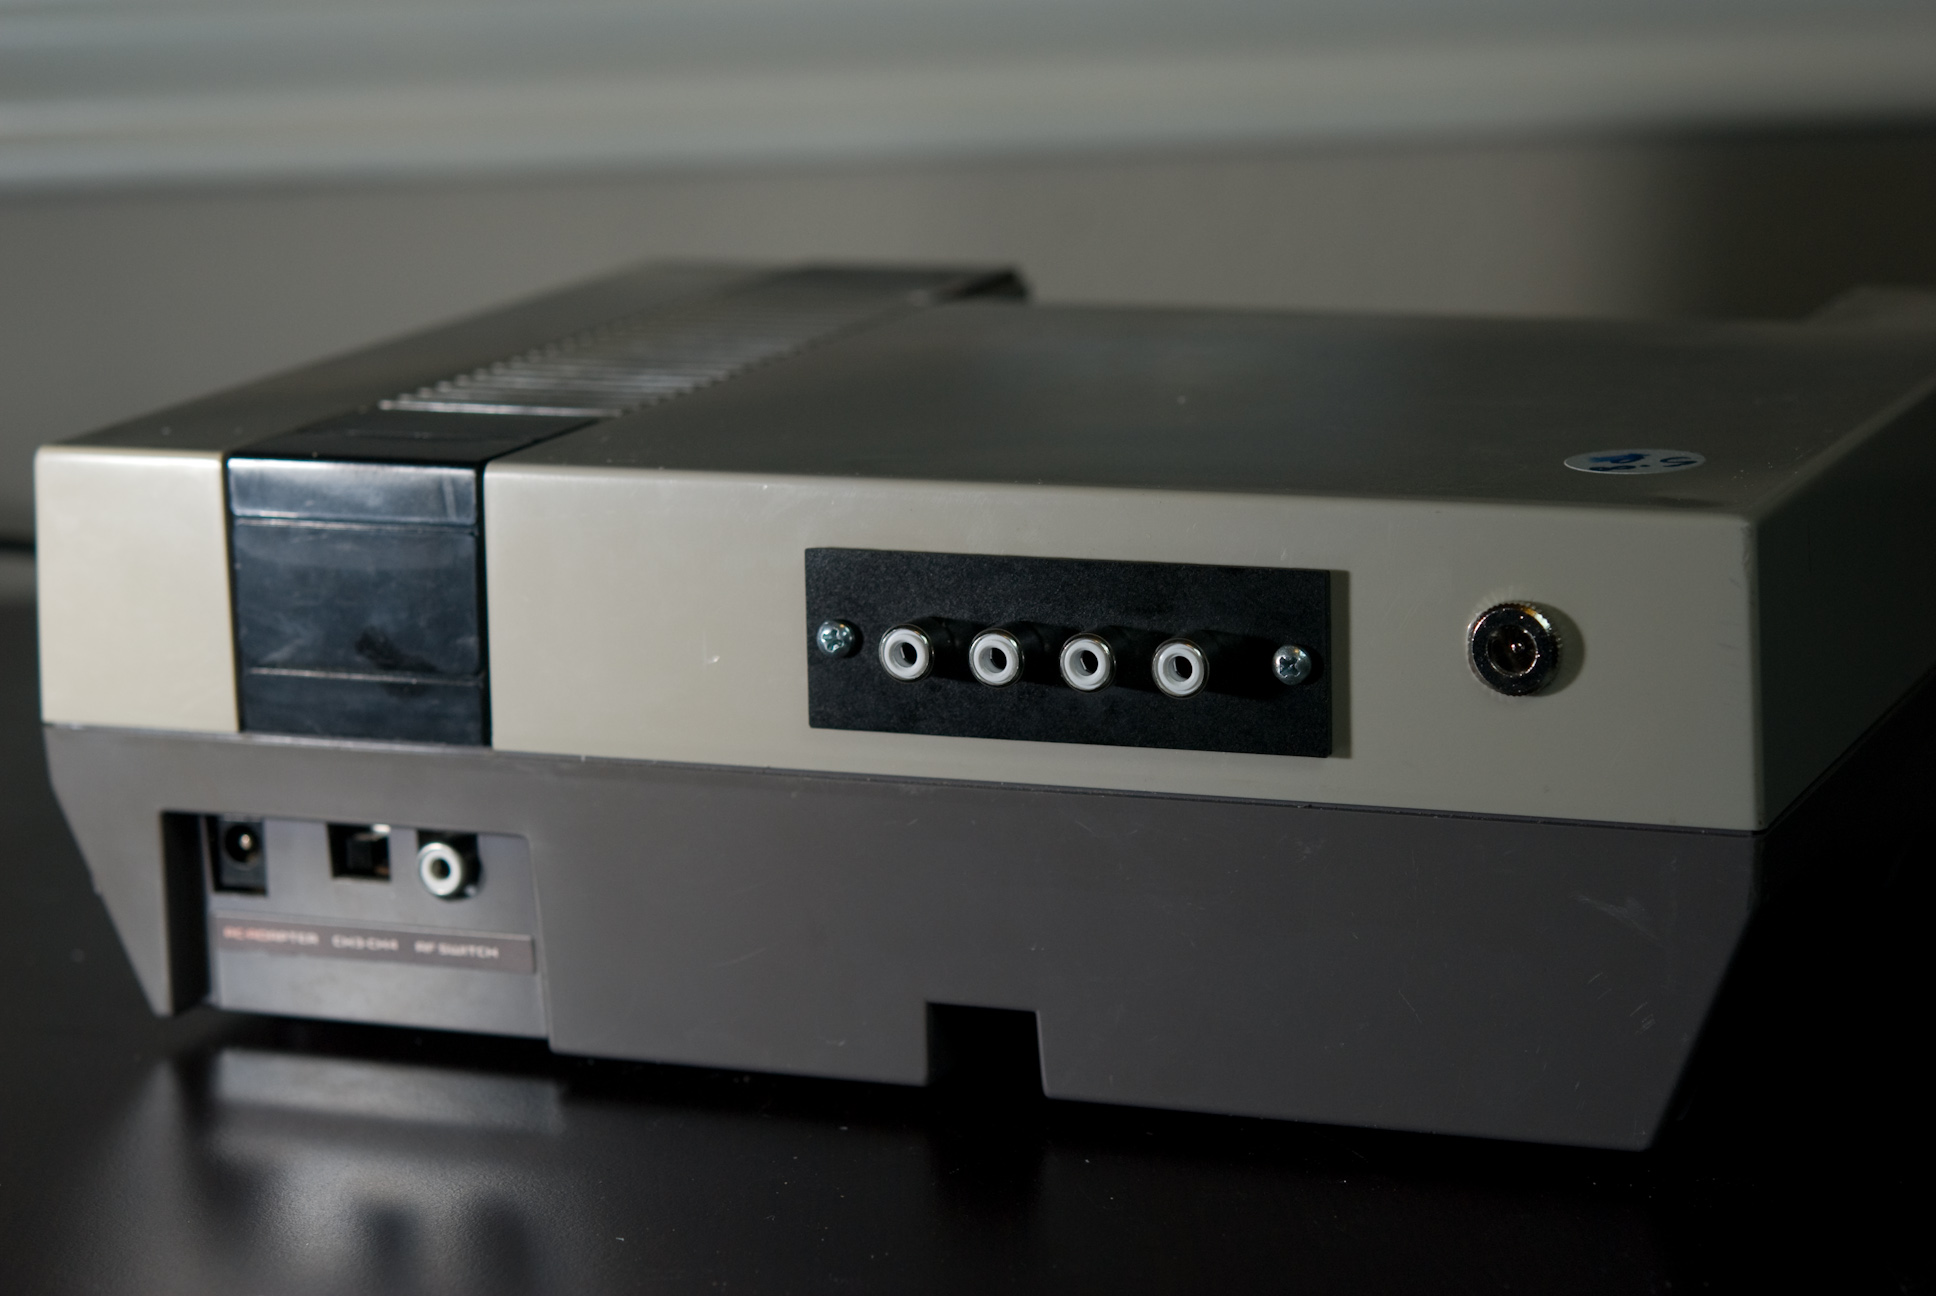
For the audio out, if using a 4x jack plate (similar to the one pictured), cut a squreish hole on the top case using a Dremmel. It does not have to be flawless, but good enough to properly mount the plate. When a position is found, also drill holes for the screws.
Gallery